
I just got a new Matebook X Pro from Amazon (which was the best UK price I could find). The hardware is very nice indeed, excellent screen with super slim bezels, great keyboard, excellent general hardware quality, and a powerful cpu. The Matebook X Pro isn’t touted as a great laptop for no reason.
Debian Testing on the Matebook Pro X
I’m happy to report that Debian Testing works great, looks fantastic, sounds decent, and has outstanding battery life. So, I’m very happy with my new laptop choice. This guide will show you how I set up my Matebook X Pro to dual boot with Debian Testing, keeping the original Windows setup completely intact (bar the Windows bootloader, which can be easily restored at a later date).
Preparing USB Boot Media in Windows
Start by booting into windows.
Login to windows, search ‘Disk’ in the start menu and select ‘Create and format hard disk partitions’ to load the windows disk management utility
On my unit I had a C: drive of about 80GB with the majority of the remaining disk partitioned as D: and named ‘Data’. The idea being to have OS installed in the 80GB partition and then data and presumably programs stored on D:
Delete just the D: ‘Data’ partition leaving a large area of un-partitioned space directly after the windows C: partition
Next extend the windows partition to take some of the newly create free space, I like to use http://www.matisse.net/bitcalc/ to work out the exact MB’s to set in Microsoft’s partition software. On mine I extended the windows C: partition to 250GB of space leaving roughly 210GB free space for linux. That’s all the partition editing in Windows done, the Linux partition will be created later from the remaining free space when installing Debian.
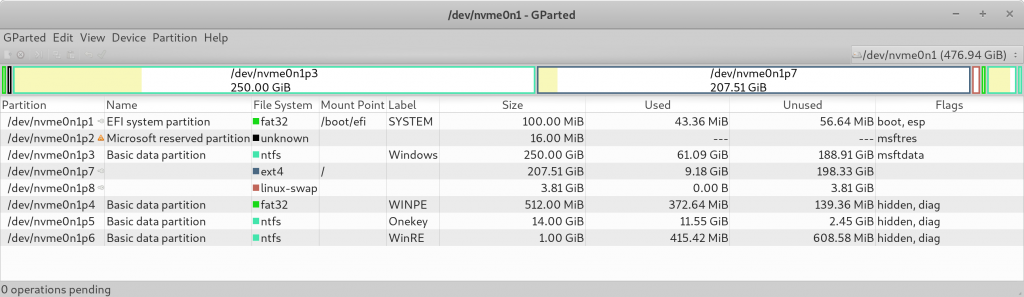
This is what my final partition layout looks like once the entirety of this post is followed (as already mentioned don’t worry about creating the Linux partitions yet)
Now download the latest weekly testing version of the Debian netinst from here https://cdimage.debian.org/cdimage/daily-builds/daily/arch-latest/amd64/iso-cd/
Get a USB stick, I used a Kingston Datatraveller
Download and install Rufus in Windows
Image the debian-testing-amd64-netinst.iso iso to your USB stick. This is simple just select the iso image and roll with the defaults in Rufus.
Installing Debian on the Matebook X Pro
Reboot your MBXP and press F4 immediately after turning on to get into the Bios. Disable ‘Secure Boot’ in the Bios then save and exit
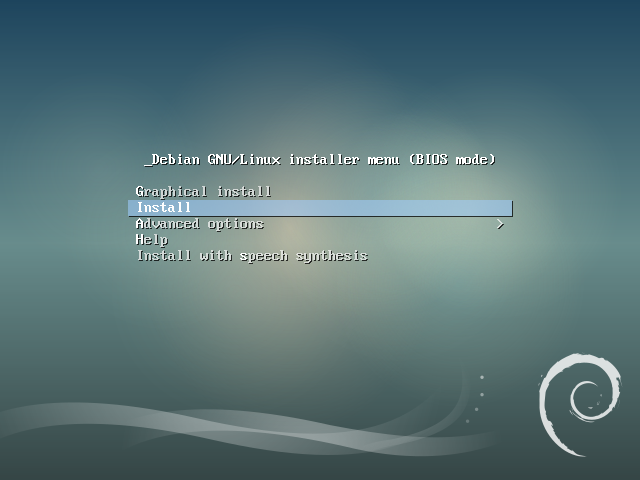
Reboot your MBXP again and press F2 immediately to install from your USB
Select the non graphical installer.
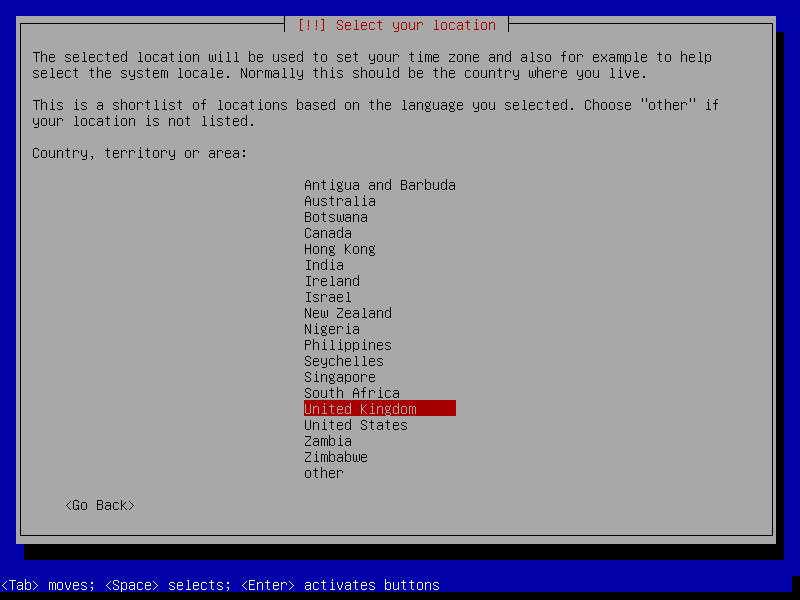
Proceed with country selection and keyboard (I went for the default UK keyboard and everything is working as expected)

When you get to partitioning options select manual partitioning.

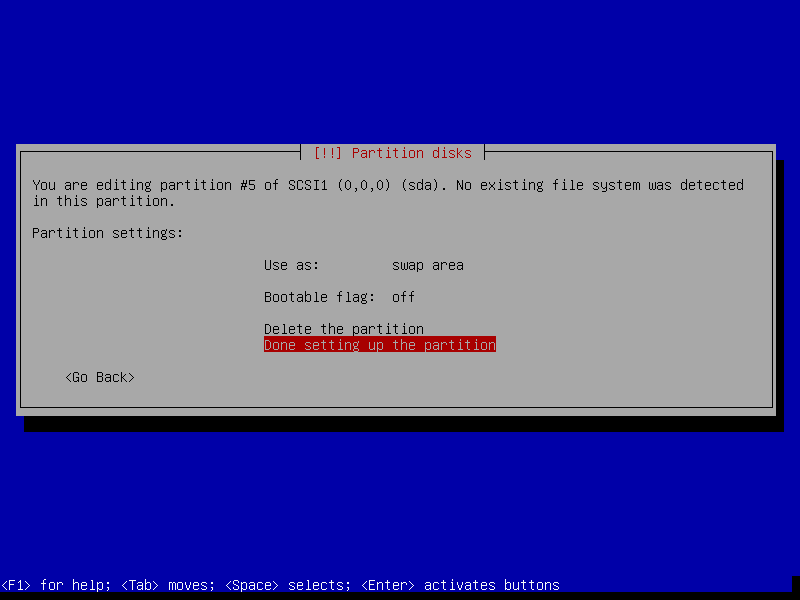
Create your swap partition first at the end of the free space. I made mine 4GB so as not to use excessive amounts of the ssd
Then create a ext4 partition with mount point / at the beginning of the remaining free space
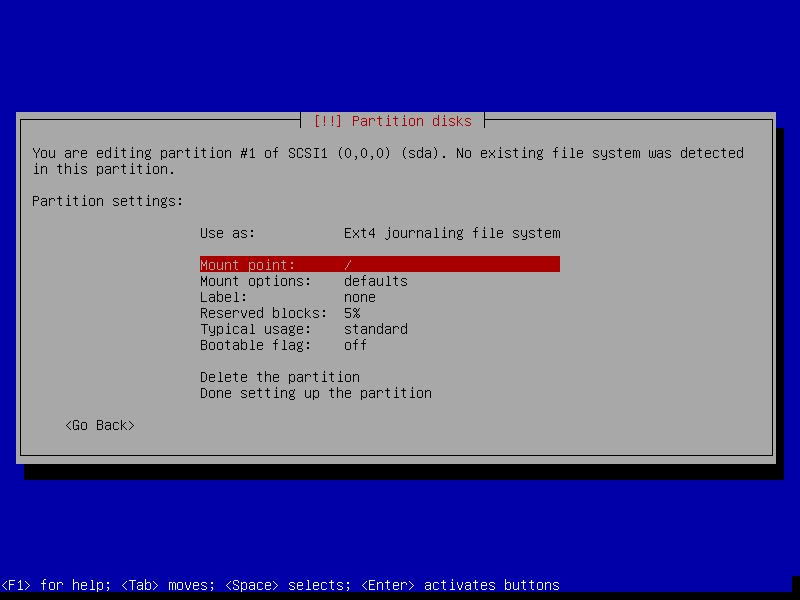
Click done and proceed with creating the 2 partitions. It should look like (but not the same partition numbers) as the below example. If you have more than 2 partitions (1 ext4 and 1 swap) you went wrong. Abort and start again.
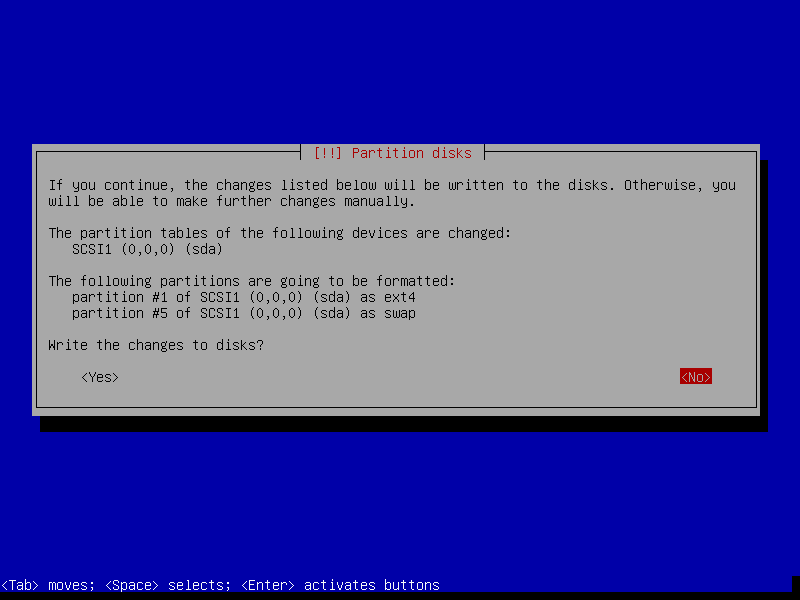
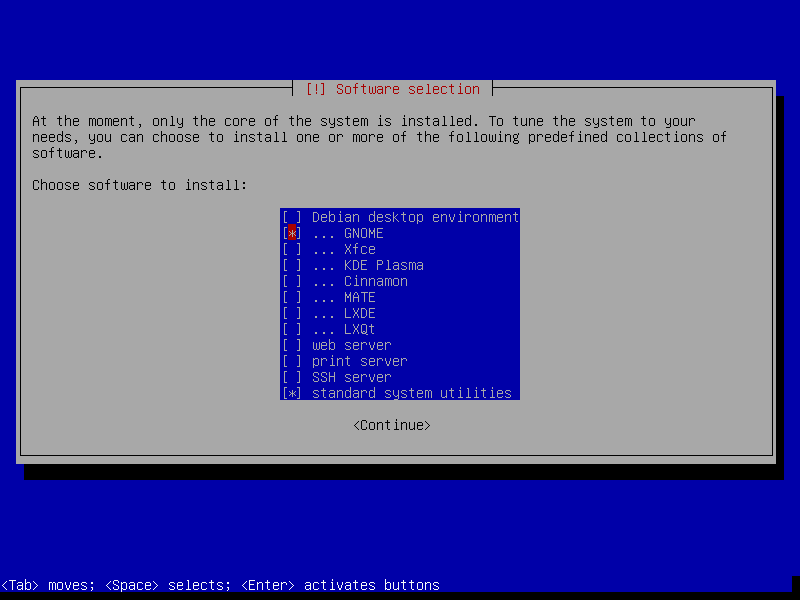
Proceed with the changes if all looks good and the Debian base system should start installing onto your newly created ext4 root partition. After this you will get to the software selection screen. Deselect everything and select Gnome as your desktop environment and standard system utilities. Then continue.
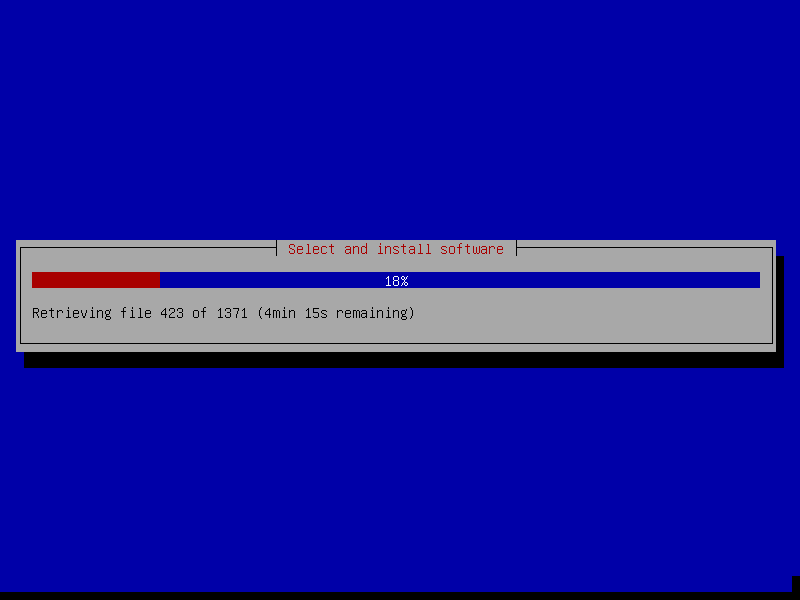
The install will look something like below and may take a while depending on the speed of your internet connection
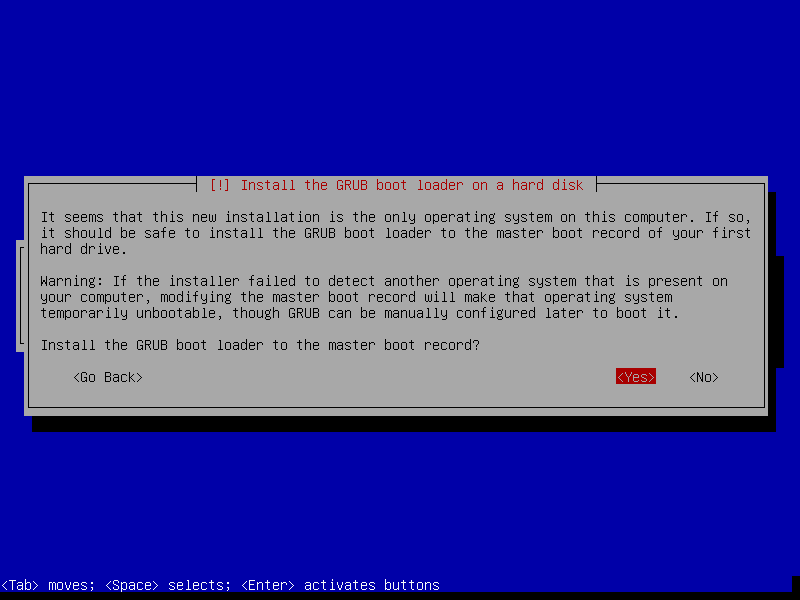
Once completed you’ll be presented with the grub boot loader install prompt. Say yes to this to install Grub to the MBR so that you can boot into your new Debian install.
Reboot when prompted and that’s the Debian installation done!
Tweaks to Debian after install
Remove unnecessary apps
Personally I like a fairly minimal base OS to start so I removed all the gnome apps I knew i would never use. If you want to cross reference what any of them are, you can check here https://packages.debian.org/buster/gnome
I ran the following in the terminal to remove the built in apps I didn’t want
sudo apt autoremove brasero evolution evolution-plugins gnome-games gnome-music gnome-orca goobox sound-juicer libreoffice-evolution inkscape nautilus-sendtopolari rhythmbox rhythmbox-plugin-cdrecorder rhythmbox-plugins simple-scan totem-plugins transmission-gtk vinagre shotwell gnome-todo
Implement the Matebook wallpapers
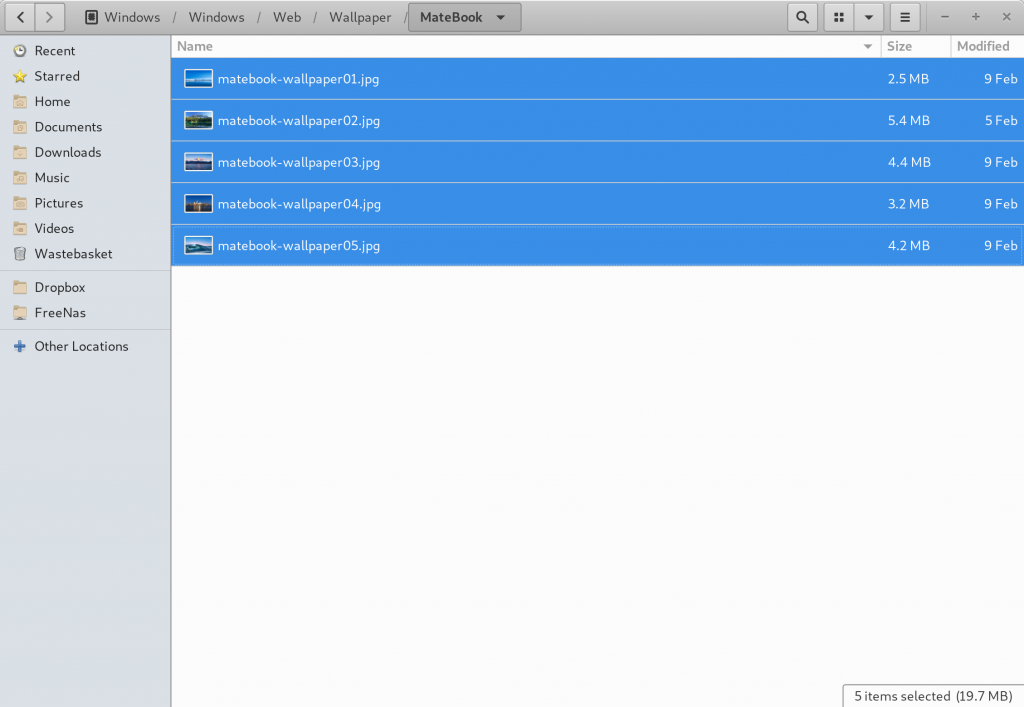
In my view the Matebook comes with some excellent default wallpapers which really show off the amazing display. These are stored on the Windows partition so copy them over to your Debian install to make it look pretty. Open ‘Files’ by hitting the Super key and searching ‘Files’. Click other locations on the left find the windows partition. Now search ‘matebook’. Find the 3K Huawei wallpapers in the /Windows/Web/Wallpaper/MateBook folder and copy them to your ‘Pictures’ directory in Debian. Once you enable right click below you’ll be able to easily set these are your wallpaper making the desktop look vastly better.
Install Gnome Tweaks
To give extra options for gnome changes and the ability to administrate gnome extensions from https://extensions.gnome.org/ run the following in terminal
or install Gnome Tweaks from the ‘Software’ app.
sudo apt install gnome-tweak-tool
Enable right click
Out of the box Gnome is set to have single click behavior like Mac OSX. I like having a right click option, now you have Gnome Tweaks installed you can change this behavior.
Press your super (windows) key and search “tweaks” and run it. Then select Keyboard & Mouse and under Mouse Click Emulation select ‘Area’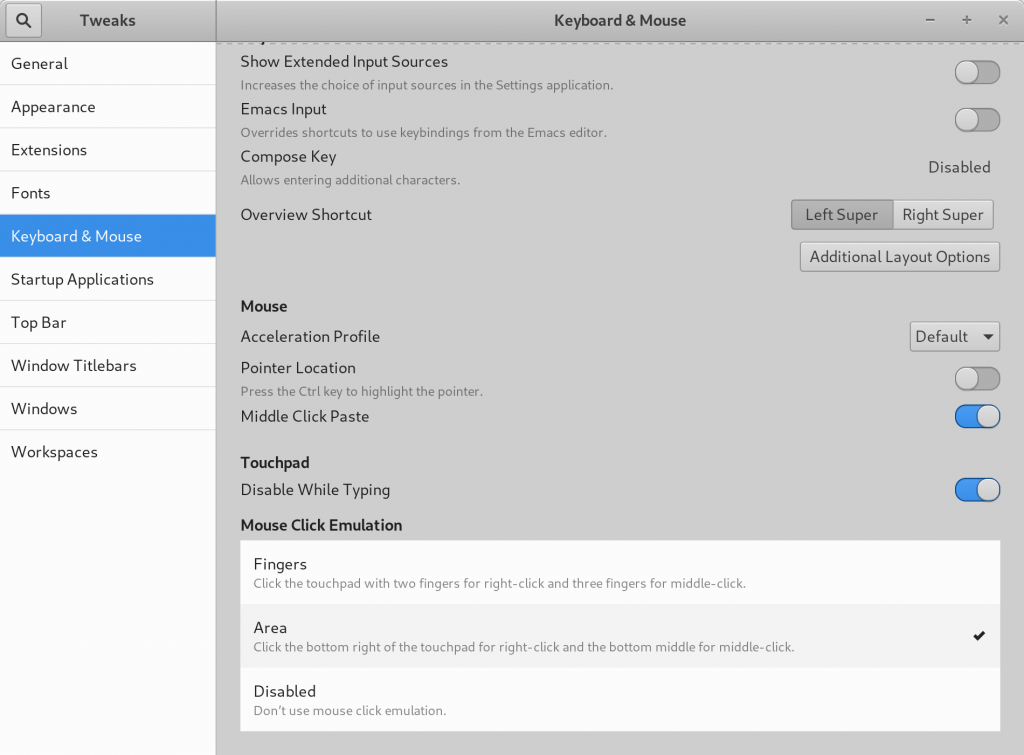
Enable Minimise & Maximise on windows
The default Gnome setup is to only have the option close windows from the title bar. I don’t like this, so again in Gnome Tweaks go to Window Titlebars. And enable Maximise & Minimise. My config is shown below.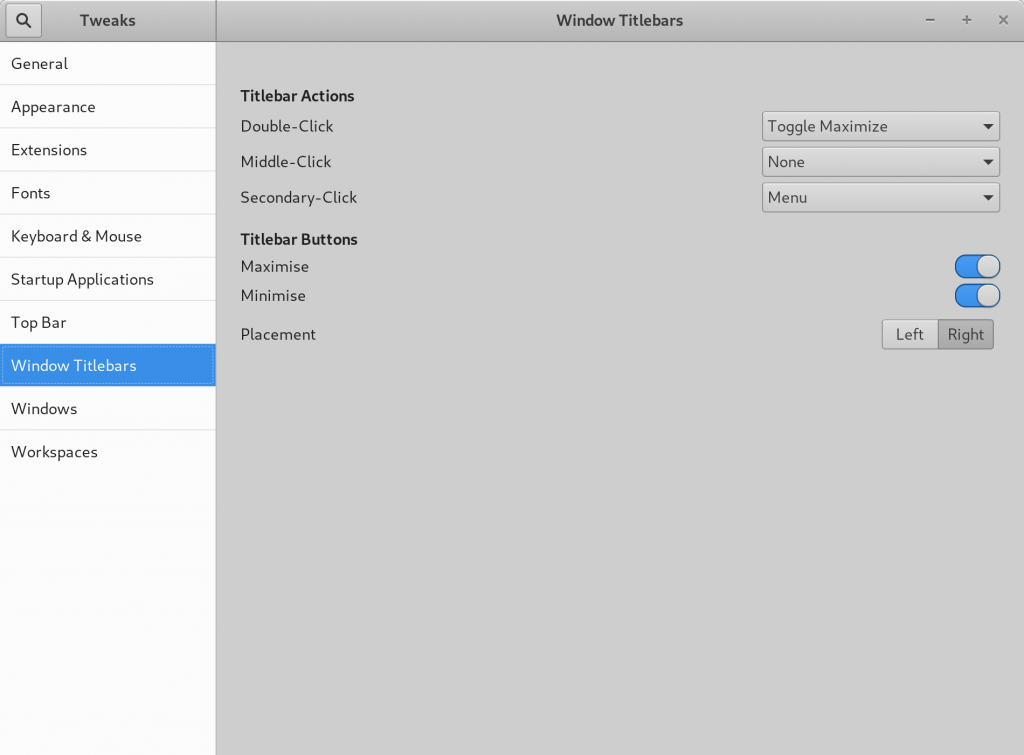
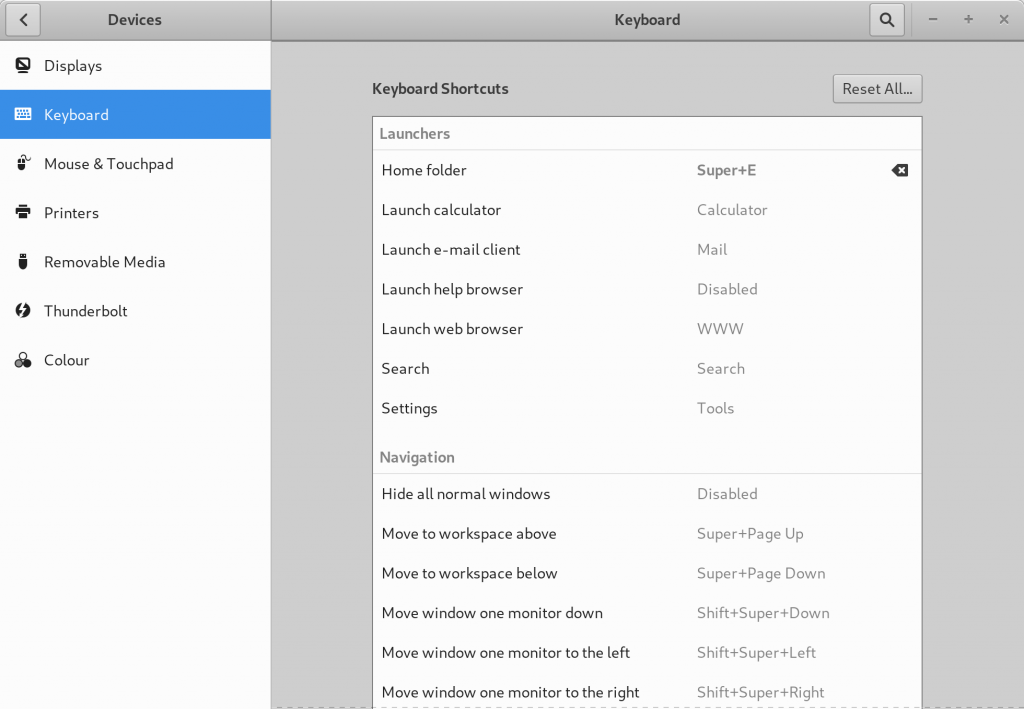
Set keyboard shortcuts
I like my file manager to be accessible by using the Super + E key in the same way Windows explorer is. Hit the Super key and search “Shortcut” to bring up the link keyboard shortcut settings. Mine looks like below
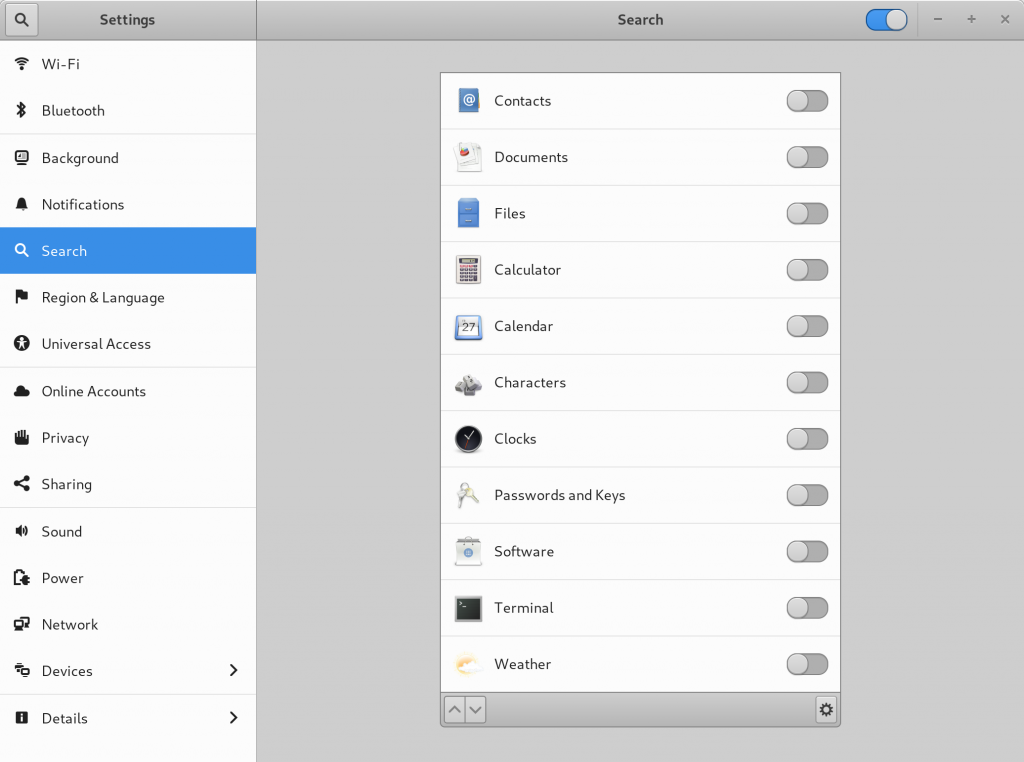
Disable some searches
Hit the super key and search for ‘search’ to bring up search options. As a default Gnome 3 is set to search a lot of different things. I think this makes the gnome search functionality feel cluttered, so although I keep search active I don’t allow it to search anything other than apps. Adjust to how you want it to work, mine looks like so:
Install the Gnome Extension software and the Gnome Extension Firefox Plugin
Install the Gnome Extension software by running the following in the terminal
sudo apt install chrome-gnome-shell
Then go to https://addons.mozilla.org/en-US/firefox/addon/gnome-shell-integration/ to add the Gnome Extensions Firefox plugin. Now you can go to https://extensions.gnome.org/ and enable Gnome extensions as you wish. You can also admin Gnome Extensions in Gnome Tweaks (installed earlier).
That’s it, those are the steps I followed to get my Matebook X Pro Debian Desktop to a good base level. Hope this is helpful for other Matebook Pro owners looking for slick linux desktop experience. Please comment below if you like this guide.